
We are excited to announce a new chapter as Knights Plumbing joins forces with Tony’s Plumbing, Heating & Air. For more than 30 years, it has been our privilege to serve homeowners throughout the Central Valley and surrounding communities, and we’re proud to partner with another local, family-operated company that has been serving the Valley since 1994.
Through this partnership, our customers will continue receiving the honest, reliable service they’ve come to expect from Knights, now with the added benefit of expanded plumbing, heating, and air conditioning services backed by a larger team and additional resources. Les will support the transition and help ensure the same commitment to quality and customer care remains at the heart of everything we do.

We’re excited about the future and grateful for the trust you’ve placed in us over the years. Read more below.
I wanted to personally share some exciting news with you. After many rewarding years serving you, I’ve made the decision to partner with a trusted local business with a strong reputation in our community.
This partnership allows us to bring you additional services including HVAC, pipe relining and more, while keeping the same level of care and attention you’ve come to expect. Our team will continue working closely with you during and after this partnership to make sure everything stays smooth. Tony’s Plumbing, Heating & Air shares our values and commitment to quality, and I’m confident you’ll be in great hands. You’ll be hearing from them soon with more details, but please don’t hesitate to reach out with any questions in the meantime.
Thank you for your trust and loyalty over the years. I’m truly grateful to have served you, and I’m excited about what’s ahead for all of us.
Warm regards,
Les Hammond
That charming older home you’re falling in love with might be hiding problems you can’t see during a walkthrough. Fresh paint and new fixtures look great, but behind the walls and under the floors, plumbing issues can be lurking issues that’ll show up on an inspection report and stop a deal in its tracks or cost you thousands after closing.
Most serious plumbing problems aren’t visible to untrained eyes. Home inspectors know where to look and what signs reveal hidden issues. After 30+ years working with Central Valley home buyers and sellers, we’ve seen these six hidden plumbing problems derail deals, force major negotiations, or become expensive surprises for new homeowners who didn’t know what they were buying.
Whether you’re buying, selling, or just want to know what’s hiding in your current home, here’s what inspectors find most often and what these issues actually mean.
These findings give you negotiating power and help you understand what you’re inheriting. Some issues are manageable with proper budgeting. Others are dealbreakers that should send you looking elsewhere. The key is knowing the difference.
Failed inspections kill deals and force last-minute price reductions. Smart sellers get pre-listing inspections and address major issues proactively rather than reactively during negotiations when buyers have maximum leverage.
Visual inspection of accessible plumbing, water pressure testing, drain function, visible leaks and water damage, and age and condition of systems. What they don’t typically check: inside pipes, sewer lines (unless you pay extra for camera inspection), or anything requiring invasive investigation.
The Central Valley Reality: Homes built before 1970 often have original plumbing that’s 50+ years old. Galvanized pipes were standard in that era. Clay sewer lines deteriorate over time. Our hard water accelerates corrosion. If you’re looking at an older Modesto home, plan on plumbing being part of the inspection conversation.
What It Is: Galvanized steel pipes were standard in homes built before the 1970s. The protective zinc coating wears away over time, and the pipe corrodes from the inside out. You can’t see this happening; the exterior looks fine while the interior is choking off water flow and preparing to fail.
How Inspectors Find It:
What It Actually Means: These pipes are at the end of their useful life. It’s not if they’ll fail, it’s when. This affects your entire plumbing system, not just one section. It’s a progressive problem that only gets worse.
The Reality: Whole-house repiping is typically needed for $4,000-15,000+, depending on home size and complexity. You can’t patch galvanized pipe problems. Replacement is the only real solution. If you’re buying, this should factor heavily into your offer price.
The Modesto Connection: We see this in nearly every older Central Valley home inspection. Neighborhoods built in the 1940s-1970s still have original galvanized plumbing. Local water quality accelerates the corrosion process. It’s extremely common here.
What to Do: Get a professional assessment of remaining lifespan. If buying, use this in negotiations; it’s a major expense you’ll face soon. If selling an older home, consider pre-listing repiping to increase sale price and speed.
What It Is: Plastic pipes used between 1978-1995, typically gray or white/cream colored. They’re known for deteriorating and failing suddenly. There were class-action lawsuits. Many insurance companies won’t cover homes with polybutylene, or they exclude water damage from coverage entirely.
How Inspectors Find It: Visual identification in accessible areas like under sinks, at the water heater, or in crawl spaces. Home age is the first clue; if built or repiped during 1978-1995, inspectors look specifically for poly.
What It Actually Means: This is a known defective product with a history of failures. Many lenders require replacement before they’ll finance the purchase. Insurance is often impossible to get. This is a serious issue, not a minor concern.
The Reality: Immediate replacement typically required $4,000-10,000+ for whole-house replacement. This is a dealbreaker for many buyers because of insurance complications. If you’re selling a home with poly, replace it before listing or expect significant price reductions and deals falling through.
What It Is: The underground pipe connecting your home to the city sewer or septic system. Tree root intrusion is the most common issue, but cracks, breaks, and sagging sections (called “bellying”) are also frequent, especially in homes with original clay sewer lines.
How Standard Inspections Miss It: Most inspectors don’t scope sewer lines unless you pay extra ($200-400). They look for red flags like slow drains throughout the house, gurgling toilets, or signs of sewage backups, but they can’t see what’s happening underground without a camera.
What Camera Inspections Reveal:
What It Actually Means: Sewer line problems cause sewage backups into your home—one of the worst plumbing emergencies possible. These are progressive problems that worsen over time. Repair costs range from $3,000 to $15,000+, depending on extent and method.
Strong Recommendation for Buyers: Get a sewer scope before purchasing any home built before 1980. That extra $200-400 can save you from discovering a $10,000 problem after closing. Make it a contingency in your offer.
Central Valley Specifics: Clay sewer lines are common in older Modesto neighborhoods. Tree roots love clay pipes. Mature trees near sewer lines are major red flags. Ground settling in our area affects pipe alignment over time.
Repair vs. Replace: Minor root intrusion can be cleared and maintained. Severe damage requires pipe replacement using either traditional excavation or trenchless technology (pipe bursting or lining), which is less invasive but still expensive.
What It Is: Plumbing vents allow air into your drain system so water flows properly and sewer gases don’t enter your home. Vents run through walls and exit through your roof. Shortcuts during DIY additions or renovations often result in improper venting, something you can’t see but definitely affects function.
How Inspectors Find It:
What It Actually Means: This violates plumbing code and causes ongoing drainage problems. It often indicates unpermitted DIY work, which raises questions about what other corners were cut. Sewer gases entering your living space are both unpleasant and potentially hazardous.
Common Scenarios: Basement bathrooms added without proper venting, kitchen island sinks (which require special venting), older homes where vents were cut or capped during roof work, and DIY bathroom additions with shortcuts.
The Reality: Correction costs vary from $500 to $3,000+, depending on how extensive the problem is. Not immediately catastrophic, but needs fixing. If buying, negotiate repairs or credit. If selling, address it proactively to avoid complications.
What It Is Beyond Age: Age matters; 12-15 years puts a water heater in replacement territory. But even newer units can have hidden issues from improper installation or maintenance neglect that accelerates failure.
How Inspectors Find It:
Hidden Issues They Spot:
What It Actually Means: Safety hazards need immediate correction before occupancy. Age over 12 years should factor into purchase negotiations; replacement is coming soon. Installation issues suggest previous unprofessional work, raising questions about other systems.
Signs of Imminent Failure: Rust-colored water, rumbling or popping sounds (sediment buildup), moisture around base, visible corrosion. Age plus any of these signs means replacement is imminent.
The Reality: Replacement costs $1,200-2,500+ installed. Safety corrections are non-negotiable. Budget for this if the water heater is over 10 years old.
What It Is: Slow leaks you can’t see causing damage behind walls, under floors, or in ceilings. Moisture creates mold and rot. Often the only visible signs are secondary effects like staining or soft spots.
How Inspectors Find It:
Common Hidden Leak Sources:
What It Actually Means: Active problems causing ongoing damage. Mold concerns affect both health and remediation costs. Structural damage is possible with long-term leaks. Indicates repair needs beyond just fixing the leak; water damage must be addressed too.
Water Damage Red Flags:
The Reality: Repair costs vary wildly—$500-10,000+, depending on the extent. You must identify and fix the source before repairing damage, or the problem will return. Mold remediation adds significant cost if present. Don’t accept “it was a one-time thing” explanations without proof.
Before Making an Offer: Factor older home plumbing into your offer price. Homes built before 1970 likely need plumbing updates soon. Budget for thorough inspections, including sewer scope.
During Inspection Period: Attend the inspection and ask questions. Don’t skip the sewer scope on older homes; that $300 can save you from a $10,000 surprise. Get repair estimates for any issues found. Understand the difference between cosmetic concerns and serious problems.
Negotiating Repairs: Prioritize safety and functionality issues. Get multiple estimates. Consider asking for credit rather than having sellers make repairs; you control quality that way. Know what’s a dealbreaker versus what’s manageable with proper budgeting.
For New Homeowners: Address critical issues before moving in. Plan and budget for eventual replacement of aging systems. Keep your inspection report for reference. Establish a relationship with a reliable local plumber who knows older homes.
Before Listing: Consider a pre-listing inspection to avoid surprises. Address obvious issues proactively; you’ll get better prices and terms than after a buyer’s inspection finds problems. Price your home to reflect its true condition. Gather documentation of any repairs or updates.
During the Sale Process: Full disclosure of known issues is required and protects you legally. Be prepared with repair estimates. Consider offering credits versus making repairs yourself. Don’t hide problems; inspectors will find them, and discovery during negotiation looks worse than upfront disclosure.
Strategic Repairs: Fix safety issues before listing. Address obvious problems affecting marketability. Some repairs pay for themselves in faster sales and higher prices. Get professional advice on what’s worth fixing versus pricing accordingly.
Minor leaks with contained damage, aging systems with 5+ years of life remaining, isolated problems with clear solutions, and issues properly factored into the purchase price.
Multiple major systems needing immediate replacement, extensive hidden water damage with mold, polybutylene pipes with insurance complications, undisclosed major issues suggesting seller dishonesty, and total repair costs exceeding your budget even with price adjustments.
The Assessment Question: What’s the cost of needed repairs versus the purchase price adjustment you can negotiate? What’s your budget and timeline for addressing issues? What’s your risk tolerance for older systems that work now but might fail soon? What’s the overall condition of the home beyond plumbing?
Hidden plumbing issues are common, especially in Central Valley homes built before 1980. Most can be managed with proper assessment, realistic budgeting, and strategic planning. Knowledge is power both in negotiations and in avoiding costly surprises after closing.
Whether you’re buying your first home or your fifth, selling a property you’ve owned for decades, or just want to know what’s lurking in your current home’s walls, get a professional assessment. That investment in knowledge prevents expensive problems down the road.
Call Tony’s Plumbing at 209-301-8620 for pre-purchase assessments, post-inspection evaluations, or honest advice about what you’re seeing on an inspection report. We’ll tell you what’s serious, what’s manageable, and what it’ll actually cost to address.
Protecting Central Valley home buyers and sellers since 1994.
That big tank in your garage is doing something right now that’s costing you money: keeping 40-50 gallons of water hot whether you’re using it or not. All day, all night, even when you’re on vacation.
More homeowners are wondering if there’s a better way. Tankless water heaters promise endless hot water, lower energy bills, and a footprint the size of a suitcase. But they come with a higher price tag and limitations that don’t get talked about enough.
Here’s the thing: tankless is great for some homes and wrong for others. After 30+ years installing both types in Central Valley homes, we at Tony’s Plumbing have seen when tankless is a game-changer and when it’s an expensive mistake. Let’s break down the real benefits, drawbacks, and costs so you can decide what’s right for your situation.
Traditional water heaters hold 40-50 gallons of water in an insulated tank, heating it constantly and keeping it hot 24/7. Turn on your shower, and hot water flows from the tank. Drain that tank with a long shower or multiple simultaneous uses, and you’re waiting 30-45 minutes for it to reheat. Most traditional tank heaters last about 10–15 years and take up significant floor space.
Tankless water heaters work completely differently. When you turn on hot water, cold water flows through the unit and is heated instantly by gas burners or electric elements. No storage tank, no waiting for reheating. These wall-mounted units are about the size of a carry-on suitcase and last 20+ years.
The core difference: A tank heater says, “Here’s 40 gallons; use it wisely.” Tankless says, “I’ll heat whatever you need, whenever you need it, within my flow rate capacity.”
Lower Energy Bills: Tankless heaters can be around 24 to 34% more energy efficient in many homes, mainly because there’s no standby heat loss. This means your heater only works when you’re using hot water. Real-world Central Valley savings typically run $100-150 per year. Over a 20-year lifespan, that’s $2,000-3,000 in savings.
Never Run Out of Hot Water: Back-to-back showers without the cold shock. No waiting between uses. For large families, this is huge. Five people getting ready in the morning all get hot water. There’s a catch about flow rate we’ll cover in the cons, but for typical usage, tankless delivers consistently.
Space Savings: Traditional tanks take up 16 square feet. Tankless units mount on the wall and use 2-3 square feet total. In small homes or tight spaces, this matters.
Longer Lifespan: 20+ years vs. 12-15 for tanks. That’s one replacement vs. two over your homeownership, meaning fewer disruptions and a better long-term return on investment.
Reduced Flood Risk: No 40-gallon flood when the tank fails. Tankless leaks are minimal, maybe a gallon or two if something goes wrong, not a catastrophic failure.
Cleaner Water: No tank corrosion or sediment buildup affecting water quality. Every drop is heated fresh as it flows through.
Higher Upfront Cost: This is the big barrier. Equipment costs $1,000-3,000+, and installation runs $2,500-4,500+ total in many cases. Compare that to $1,200-2,500 for a traditional tank installed. ROI typically takes 10-15 years. If you’re not staying in your home that long, you may not realize the financial benefit.
Installation Complexity: Tankless isn’t a simple swap. Gas lines usually need upgrading; most older homes have 1/2″ lines; tankless often needs 3/4″ or larger. Even gas units need electricity for controls. Venting requirements differ from tank heaters. Permits and inspections add time and cost. In older Central Valley homes, these infrastructure upgrades significantly increase costs.
Flow Rate Limitations: “Endless hot water” has limits. Each unit has a maximum flow rate (5-8 GPM typically). Two showers (5 GPM) are fine. Add the dishwasher and washing machine simultaneously, and you’ve exceeded capacity, resulting in temperature drops. Large families might need bigger or multiple units, which costs significantly more. Proper sizing is critical.
Temperature Inconsistencies: Some users experience the “cold water sandwich,” a brief cold burst between uses. Tankless can struggle with very low flow rates. Not dealbreakers, but worth knowing.
Hard Water Issues: Mineral buildup requires annual descaling, especially common in parts of the Central Valley. That’s $100-200/year in maintenance costs. Very hard water might require descaling twice annually or a water softener (additional upfront cost).
More Complex Maintenance: Annual maintenance is recommended: descaling, filter cleaning, and burner checks. Tank heaters need minimal maintenance. Not all plumbers have tankless experience, which can mean higher service costs.
No Hot Water During Power Outages: Gas tankless heaters need electricity for controls. No power means no hot water, unlike traditional gas tanks that can often operate during outages.
Higher Repair Costs: Components are more complex and expensive. Parts might need ordering. Finding qualified technicians can be challenging.
Equipment Costs:
Installation Costs:
The Central Valley Reality: Homes built 50+ years ago typically need more extensive upgrades. Original gas infrastructure wasn’t designed for tankless. Plan for higher-end costs in older neighborhoods.
Total Cost of Ownership (20 Years):
Tankless:
Tank (2-3 replacements):
The numbers are close over 20 years. Tankless comes out slightly ahead but not dramatically. This is why it’s not purely a financial decision; many choose tankless for other benefits with savings as a bonus.
Choose Tankless If:
Stick with Tank If:
Middle Ground Options: High-efficiency tank heaters offer better efficiency without tankless complexity. Point-of-use tankless works for specific applications like distant bathrooms.
“Instant hot water at the tap”: No, water still travels from heater to fixture. You wait the same time, but once it arrives, it doesn’t run out.
“One unit handles any home”: Wrong, sizing matters. Large homes sometimes need multiple units.
“Maintenance-free”: No, annual maintenance is recommended, more so in hard water areas.
“Quick payback”: Rarely, 10-15 years is realistic for most homeowners.
Simple framework:
What matters most: your usage patterns, your budget (upfront and long-term), your home’s infrastructure, your timeline, and your maintenance willingness.
Tankless offers real benefits: efficiency, endless hot water, a longer lifespan, and space savings. But it’s not universal. The right choice depends entirely on your specific situation.

Let’s talk about what makes sense for your home. We’ll assess your usage, evaluate your infrastructure, identify needed upgrades, and give honest recommendations. If tankless is great, we’ll tell you why and what it costs. If a tank makes more sense, we’ll tell you that too.
No pressure, no upselling, just straightforward information from people who’ve been doing this in the Central Valley for 30+ years.
Call Tony’s Plumbing. Day, night, or weekends, we’re here to help you make the right choice.
Protecting Modesto homes since 1994.
The biggest downsides are higher upfront cost, more complex installation, flow rate limits, and more maintenance (especially in hard water areas). Repairs can also be more expensive compared to a basic tank heater.
In many cases, yes, but it’s not always a simple swap. A tankless install may require gas line upgrades, venting changes, electrical work, and permits, especially in older homes. The key is proper sizing so your home doesn’t lose hot water when multiple fixtures run at once.
Sometimes. Certain high-efficiency water heaters may qualify for federal tax credits, but eligibility can change and depends on the model and energy rating. If you’re considering a tankless upgrade, it’s worth checking the current IRS energy credit guidelines or confirming with a tax professional.
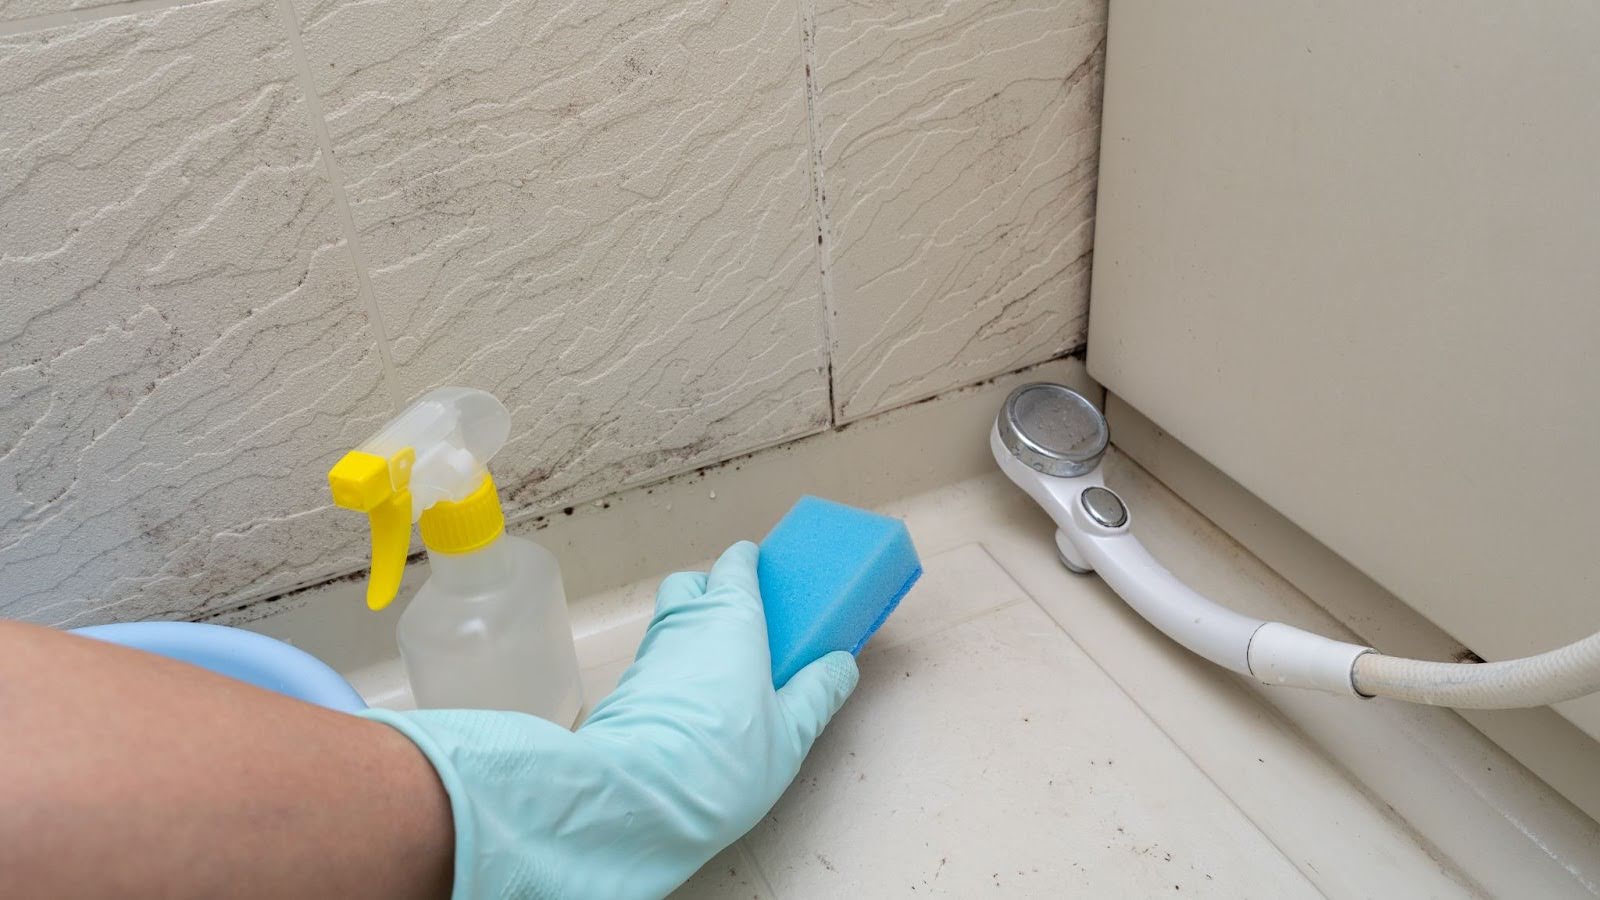
You scrub it away, and a couple weeks later it is back. Black spots on grout, fuzzy corners in the shower, and that musty smell when you open the door. Bathroom mold feels endless.
Here is the truth: if molds keep returning, cleaning is not the main problem. Moisture is. And most long-term moisture problems in a bathroom are tied to plumbing, drainage, condensation, or ventilation.
This guide breaks down what is feeding the bathroom mold and what to fix so it stays gone.
Mold needs moisture, warmth, and something to cling to like soap film, skin cells, grout, and drywall paper. Bathrooms provide all of that.
The difference between a bathroom that stays clean and one that keeps growing mold is usually simple: how fast moisture leaves the room and whether water is leaking into places you cannot see.
Here are the plumbing issues that feed bathroom mold:
A hidden problem can keep building materials damp for months. You might not see water, but mold will show up on the surface.
Common leak sources:
If you clean mold but the moisture source stays, mold returns quickly.
Slow drains and pooling water keep the bathroom humid longer. Even a small puddle in the shower pan can raise humidity for hours.
Drainage problems can come from:
Cold surfaces collect water when they meet warm, humid air. In bathrooms, this often shows up as
Condensation can be enough to feed mold, especially behind toilets and inside vanity cabinets.
Ventilation matters because steam has to leave the room. If it does not, it settles on walls, ceilings, and corners.
Problems we see often:
If any of these are true, focus less on cleaning and more on finding the moisture source:
You can catch many issues early with simple checks.
Open the vanity and look at the back wall and the cabinet floor. Feel around connections. Check the toilet base. Look for staining around the tub and shower edges.
Run your hand along supply lines and shutoff valves. Feel for dampness. Dry pipes should feel dry, not cool and wet.
Turn off all water inside and outside the home. Check the water meter. If it is still moving, there is a leak somewhere.
If you suspect a leak but cannot find it, it is worth calling a plumber. Hidden moisture behind tile or inside walls can turn into a much larger repair if it keeps going.
Bathroom mold keeps coming back because moisture is still present. Here are the plumbing issues that feed bathroom mold and what to fix to stop it at the source.
Start with the most likely places.
Under the sink: tighten connections, replace worn supply lines, repair slow drips, and remove items so you can actually see moisture.
Around the toilet: if the toilet rocks, the seal may be compromised. A failing wax ring can leak at every flush and soak the subfloor.
Tub and shower edges: cracked grout and failing caulk are not cosmetic. They can let water behind the tile and into the wall.
If you are comfortable with basic DIY, small fixes like replacing a supply line or re-caulking can help. If you are unsure, skip the guesswork. Bad repairs often create bigger leaks.
Call a plumber if:
Even without leaks, daily steam can keep mold thriving.
Get the fan doing its job
Run the bathroom fan during showers and for 20 to 30 minutes after. If people forget, install a timer switch.
Also make sure the fan actually vents outside. If it dumps moisture into the attic, the moisture problem is still there.
Stop sweating pipes
Insulate cold water pipes with foam sleeves. This is inexpensive and easy, and it reduces condensation that drips into cabinets and wall cavities.
Deal with a sweating toilet tank
If your toilet tank sweats often, start with basic humidity control and fan use. If it still sweats, a plumber can discuss options such as anti-sweat solutions or other upgrades depending on your setup.
Simple daily habits that help
Use habits that reduce the moisture load without turning your life into a chore:
Good drainage means water doesn’t stick around long enough to cause problems.
Shower and Tub Drainage
Slow drains make mold worse. If water pools or drains slowly, moisture stays in the bathroom longer. Hair and soap buildup are usually the cause, so clean the drain cover and remove buildup regularly. If it still drains slowly, the issue may be deeper in the line, the venting, or even the main sewer, and it’s time to call a plumber.
Shower Slope and Standing Water
Your shower floor should slope toward the drain. If water collects in corners, it can keep the bathroom damp and feed mold. Fixing slope or shower pan issues usually requires professional repair.
Plumbing Upgrades That Reduce Humidity
Some plumbing choices affect how much moisture you’re generating in the first place. Low-flow showerheads use less water, which means less steam. Temperature-regulating shower valves help you avoid scalding water temperatures that create excessive steam.
Rain showerheads and oversized shower systems, while luxurious, generate more steam than standard showerheads. If you’ve got one of these and a mold problem, the connection might be direct.
Some mold problems are beyond DIY prevention. Call a professional plumber if:
At Tony’s Plumbing, we can inspect your bathroom plumbing, locate leaks without unnecessary damage, and fix the source of the moisture so the problem does not return.
Bathroom mold is not just a cleaning issue. It is usually a moisture problem caused by leaks, poor drainage, or humidity that has nowhere to go. If that moisture stays in your bathroom, mold will keep coming back no matter how often you scrub.
By fixing the source, you protect your home from bigger issues like hidden water damage, damaged drywall, and costly repairs down the road.
If you keep seeing bathroom mold and cannot find the cause, call Tony’s Plumbing at 209-284-5489. We’ll inspect for hidden leaks, drainage issues, and moisture problems and recommend the right fix so you can stop dealing with the same issue over and over.
It can be. Mold exposure can trigger allergies and irritate breathing, especially for kids, older adults, and anyone with asthma or sensitivities. If you have health concerns, talk to a healthcare professional and focus on stopping the moisture source.
You cannot confirm mold type by appearance alone. Many molds look similar. If you are worried about a health risk, treat it seriously, avoid disturbing it, and get an inspection.
Nothing “permanently” kills mold if moisture keeps coming back. The lasting fix is moisture control: repair leaks, improve ventilation, stop condensation, and keep water draining properly.
Clean what you can safely, but prioritize stopping the moisture source. If it returns quickly or shows up in multiple spots, get the plumbing checked.
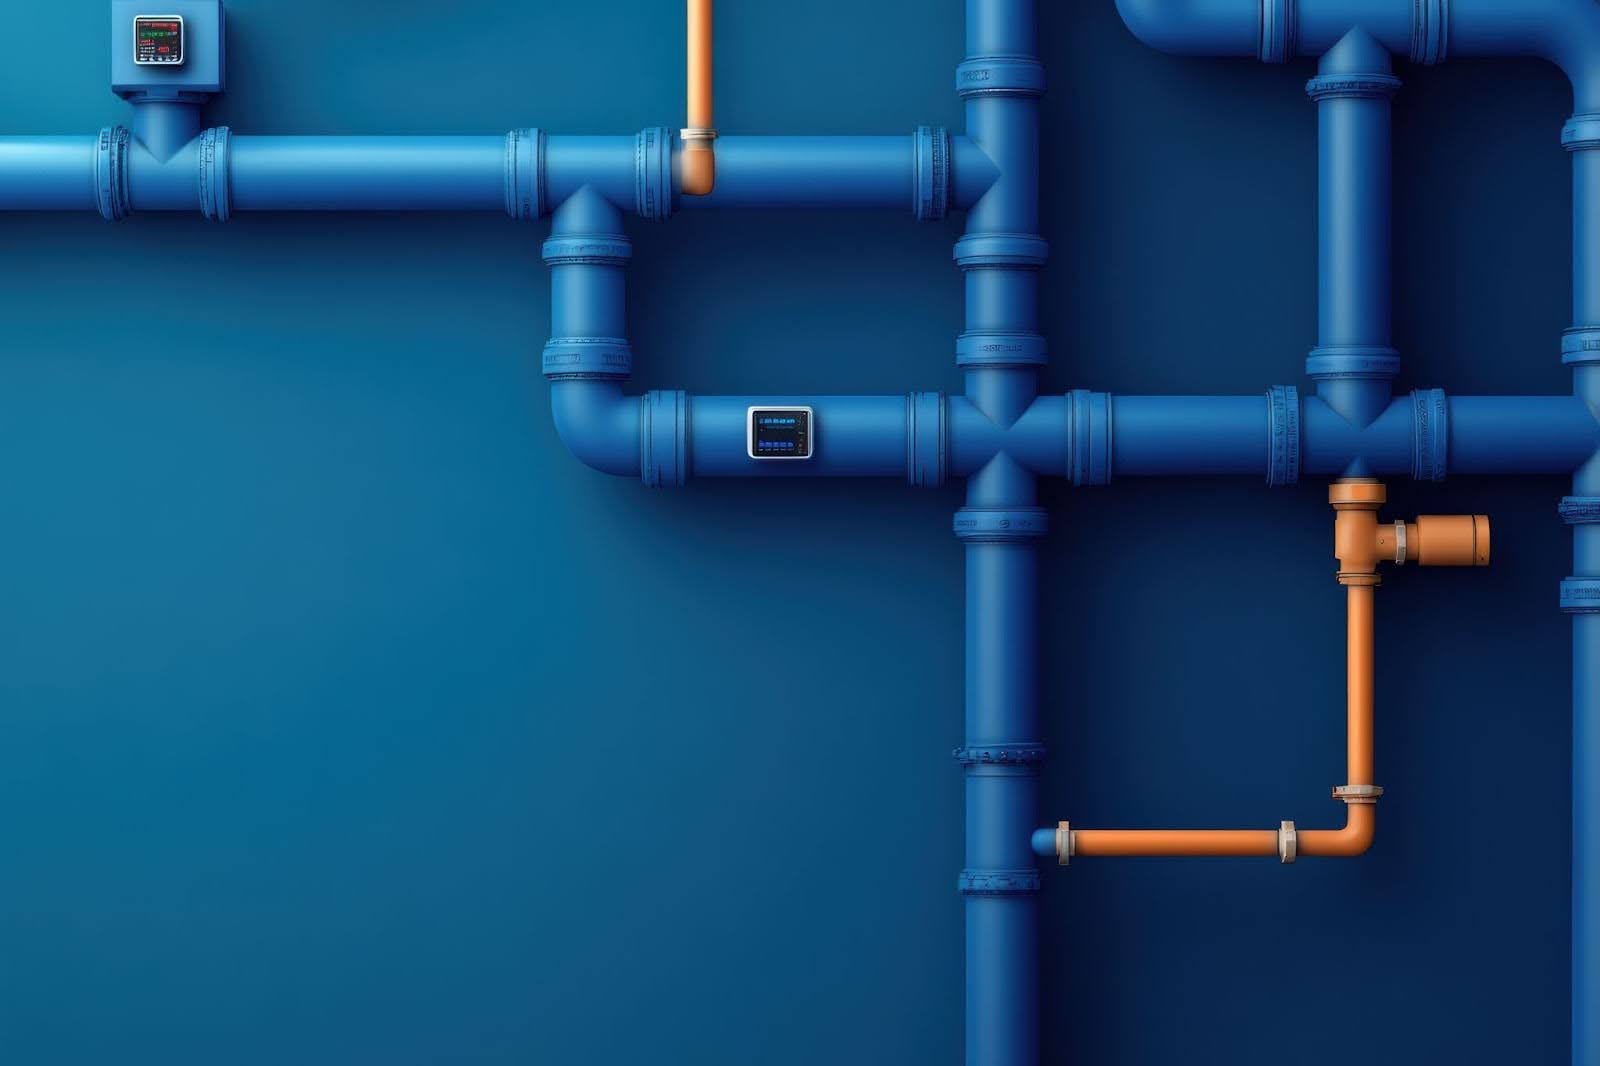
When you’re facing a whole-house repipe, one of the biggest questions keeping you up at night is probably this: “How long is my life going to be disrupted?” It’s a fair concern. We’re talking about replacing the veins and arteries of your home’s plumbing system, and nobody wants to live in a construction zone any longer than necessary.
Here’s the thing: repiping isn’t as drawn-out as you might fear. But it’s also not an afternoon project. In this blog post, let’s walk you through what to expect, day by day, so you can plan your life around the work without any surprises.
For a typical home in Modesto or the surrounding Central Valley, a whole-home repipe usually takes 2–4 working days from start to finish.
That said, smaller homes with easy access can sometimes be completed in 1–2 days, while larger or more complex homes may take up to 5 working days.
Here’s a realistic range based on home size:
This timeline refers to working days when a crew is actively on site. Depending on scheduling, those days may run back-to-back or be spread out across a week.
Water is usually shut off during active work hours, but in most cases we restore it by late afternoon or early evening so you can use your bathrooms and kitchen overnight.
Even though the actual installation is often only a few days, repiping is still a process with a few important steps before and after the work begins.
Here’s what a full timeline usually looks like.
The first step is checking your current plumbing system and getting a clear plan in place.
During the inspection, we look at the material and condition of your pipes, water pressure issues, and how the plumbing is routed through your home. That helps us determine what needs to be replaced and what the cleanest path will be for new lines.
This is also the best time to ask questions like, “Will water be shut off all day?” How much wall access is needed?” What’s the most realistic timeline for this home?
Once we’ve assessed your system and you’ve given us the green light, we move into planning mode. This means:
You’ll also have a short prep list at home. Most homeowners only need to do a few basic things like clearing under sinks and moving items away from walls where work may be needed.
The goal is simple: avoid delays on installation day.
To give you a realistic picture, here’s how a repipe often goes in an average 2,000 sq ft home. Your home may be faster or slower, but the workflow is usually similar.
Day 1: Access and Removal
Work starts by shutting off the main water supply. From there, small access points are opened in strategic areas so the crew can reach the existing plumbing. Once those are in place, old piping is removed and new lines are started.
If your home has older galvanized pipes, removal can take longer, since those pipes are often heavily corroded.
By the end of Day 1, most homes have visible progress and a clear path forward.
Day 2: New Lines Installed and Fixtures Reconnected
Day 2 is usually when most of the progress happens. New water lines are run to key areas of the house, including
This is also when shut-off valves are installed where needed. That way, future repairs do not require shutting down the entire home. As each section is completed, it is checked for proper flow and leaks before moving on.
For many average-sized homes, Day 2 may be the last full day of installation.
Day 3: Pressure Testing, Final Checks, and Cleanup
If your home needs a third day, this is where the project is finalized. This step matters more than homeowners realize. The new plumbing system should be tested carefully. That includes pressurizing the system, checking each connection, and running water at each fixture to confirm everything performs correctly.
Once testing is complete, cleanup and patching begin. Any access holes created for the repipe will be repaired so your home is left in good shape.
In most cases, homeowners may still need to do final paint or texture touch-ups, but the job site itself should be cleaned thoroughly and all debris removed.
A final walkthrough should happen at the end so you know:
Every home is different, and several factors can speed up or slow down the process:
Factors That Speed Things Up:
Factors That Add Time:
The Modesto Factor:
Here in the Central Valley, we see a lot of homes that are 50+ years old with original galvanized piping. These homes often present unique challenges; the pipes are severely corroded, they’re hidden behind original plaster walls, and access can be tricky.
Our 30+ years of local experience means we’ve seen it all and can navigate these challenges efficiently. We know what to expect in a 1960s ranch in Farmington or a 1940s bungalow in downtown Modesto, and that experience leads to more accurate timelines and fewer surprises.
Let’s talk about the practical realities of having your home repiped, because this is where life gets temporarily disrupted.
Water Access
Your water is usually shut off during active work hours. In most cases, we restore water by late afternoon or early evening so you can shower, cook, and use your bathrooms overnight.
To make the day easier, plan ahead:
In some situations, we may be able to turn the water back on briefly during the day, but it depends on the stage of the install.
Repiping is not a quiet job. You’ll hear cutting, drilling, and general tool noise as we work through different areas of the house.
If you work from home, you may want to plan to be out for part of the day. If you have young kids who nap, let us know. We can often adjust the loudest work when possible.
Access and Mess
We’ll need access to spaces like bathrooms, the kitchen, the laundry area, and the water heater. Most homeowners find it easiest to be away during work hours and check in later in the day.
We work carefully to keep things clean, but some dust is normal. It helps to move valuables away from work areas and clear out under-sink cabinets before we start.
You do not have to be home the entire time as long as we have access to the needed areas. Many homeowners prefer to leave during the busiest hours and return in the evening. If you need to stay home, that’s fine too. We’ll work around you.
Can it be done faster?
Sometimes, especially in smaller homes with easy access. But rushing a repipe increases the chance of mistakes and leaks later. We move efficiently, but we don’t cut corners.
What causes delays?
Most delays come from things that can’t be seen until work starts, such as hidden damage or plumbing that’s harder to access than expected. Weather can also impact the timeline if exterior work is involved.
If anything changes, you should be updated right away so you’re not left guessing.
Do you work weekends?
Weekend availability is often possible, especially for urgent repairs or homeowners who prefer the work done when they’re home.
Once the repipe is complete, your plumbing should feel better right away. It’s normal to hear small sounds at first as water moves through new lines. Many homeowners also notice stronger pressure, especially if the old pipes were corroded inside.
Over the next couple of weeks, keep an eye out for anything unusual. If you spot a leak or anything that doesn’t seem right, call us and we’ll take care of it. Our workmanship is backed by a one-year craftsmanship warranty.
Depending on your city, a final inspection may be required. If it is, we’ll coordinate it and make sure everything meets local requirements.
When you’re getting ready for a repipe, you’re not just planning the work. You’re planning your life around it. That might mean adjusting your work schedule, figuring out meals for a few days, or deciding if you want to be home during the busiest hours.
A clear, accurate timeline helps you feel prepared, not stressed.
Most whole-home repipes take just a few working days, but the real timeline depends on your home’s size, layout, and how accessible the plumbing is. The last thing you want is a simple estimate that turns into a longer disruption than expected.
Tony’s Plumbing has been serving Modesto since 1994, and we know what repiping looks like in Central Valley homes, especially the older ones with aging or corroded lines. We’ll inspect your system, walk you through the process, and give you a timeline you can actually plan around.
Contact us to schedule a repipe evaluation, get a clear day-by-day timeline, or talk through your options if you’re dealing with low pressure, discolored water, or recurring leaks.
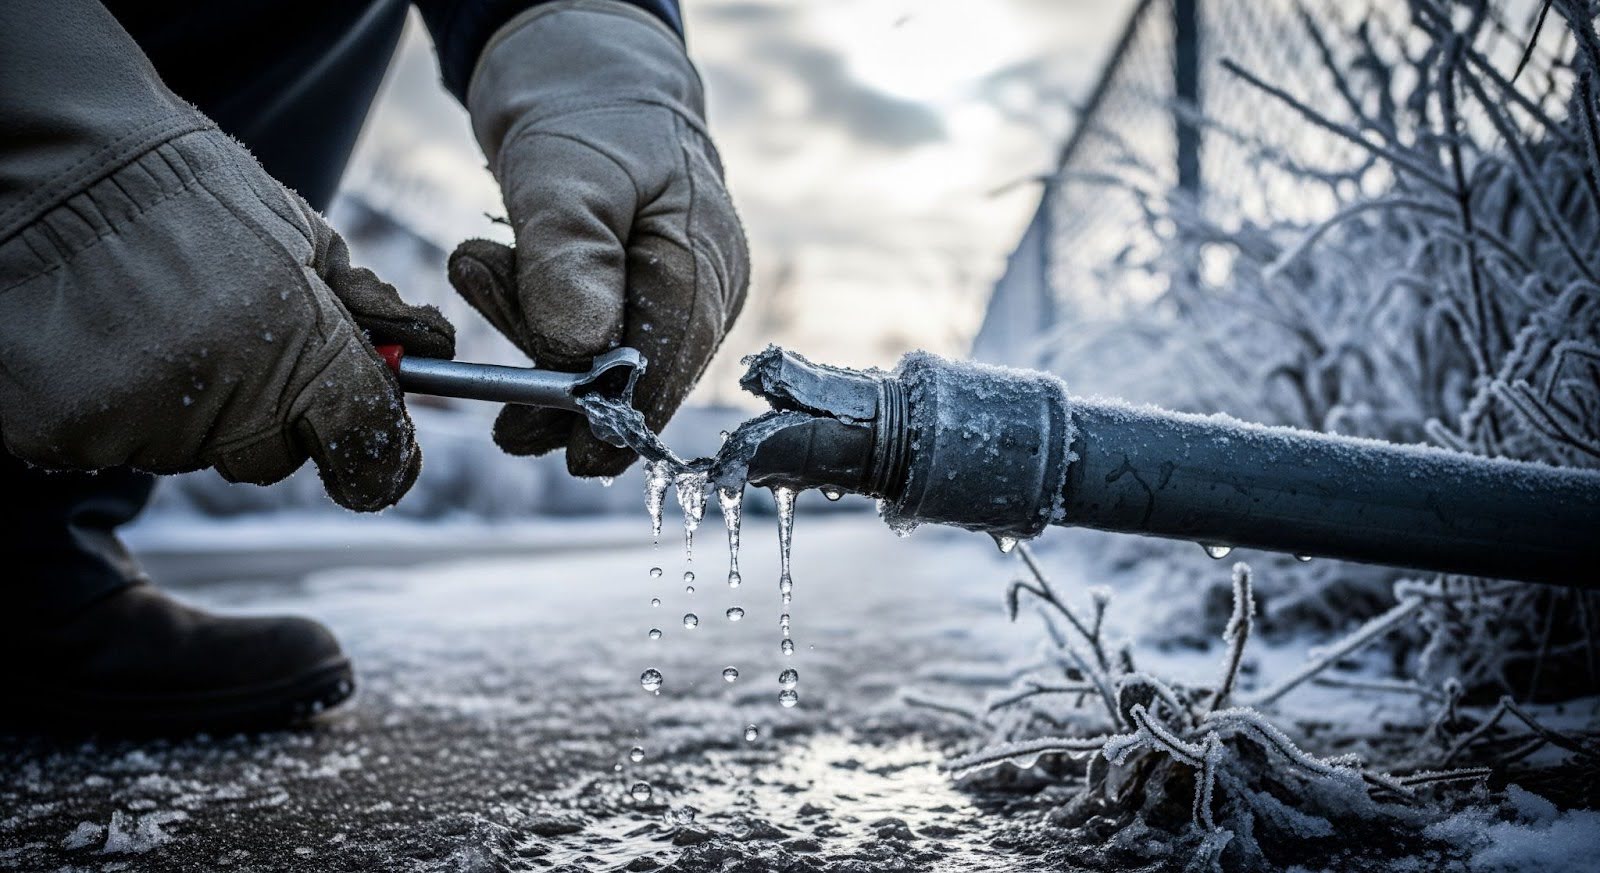
Frozen pipes cause over $5 billion in U.S. damage yearly. One burst pipe can flood your home with hundreds of gallons, costing $2,000-$5,000 in repairs.
Here in the Central Valley, we don’t see the extreme cold of northern states, but when temps drop below 28°F, especially overnight, unprotected pipes freeze fast. The good news? Simple prevention keeps your plumbing safe and your home dry.
Here’s everything you need to protect your pipes this winter.
Water expands 9% when frozen. A 1-inch pipe holds 1.5 gallons, and that expansion cracks pipes at weak points.
The Process:
Most Vulnerable: Copper and CPVC crack easily. PEX has flexibility but still fails under extreme pressure.
Exterior Walls
Crawlspaces and Basements
Outdoor Fixtures
Attics
Early Signs:
Emergency Signs:
| Risk Area | Freeze Time at 20°F | Damage Cost |
| Uninsulated exterior pipes | 4-6 hours | $2,000 burst repair |
| Crawlspace lines | 6-8 hours | $3,500+ slab reroute |
| Hose bibs | 2-4 hours | $500 replacement |
| Attic supply lines | 5-7 hours | $1,500-$3,000 |
Reality: Prevention costs $50-$200. Repairs cost $1,000-$5,000+.
How long at 32°F before pipes freeze? 6-8 hours with wind chill, less on exposed pipes. Act at 28°F.
At what temperature should you drip faucets? Below 28°F, especially overnight.
Moving water doesn’t freeze easily.
DIY Cost: $50 covers 100 feet
Even “frost-free” hose bibs fail if hoses stay connected.
Cost of 55°F: $50-$100/month. Burst pipe: $2,000+.
Cold drafts freeze pipes faster than low temps alone.
15 minutes weekly prevents days of disruption and thousands in costs.
| Material | Best For | Cost/10 ft | Pros | Cons |
| Foam tube sleeves | Straight runs, hot/cold lines | $5-10 | Easy install, cheap | Gaps at joints |
| Fiberglass wrap | Irregular pipes, tight spaces | $8-15 | Heat-resistant, flexible | Needs tape/ties |
| Electrical heat tape | Extreme cold, problem areas | $15-25 | Active heating | Needs power, fire risk |
| Spray foam | Large gaps, irregular spaces | $20+ | Complete seal | Permanent, messy |
Foam Pipe Sleeves
Heat Tape (Electric)
Fiberglass Wrap
Insulate First:
DIY ($50-$100):
Professional ($200-$500):
Worth calling a pro: Previous freeze issues, hard-to-reach pipes, and comprehensive protection needed.
WiFi Temperature Sensors ($30-$60)
Smart Thermostats ($150-$250)
Whole-Home Water Monitoring ($200-$500)
Worth it? If you travel in winter or own rental/vacation properties, it pays for itself in one prevented incident.
Newspaper or towels – Trap moisture, compress, fire hazard
Non-UL listed heat tape – Fire risk, unreliable
Cheap alternatives – Deteriorate quickly, leave gaps
Winterizing = preparing plumbing for extended periods without heat (vacant homes, seasonal properties).
Don’t winterize if: Someone lives there and heat stays on. Use standard prevention instead.
Step 1: Drain the System
Step 2: Blow Out Lines
Step 3: Add Antifreeze
Step 4: Protect Appliances
You Need:
How much does a plumber charge to winterize?
| Home Size | Cost | Includes |
| 1,000-1,500 sq ft | $150-$250 | Basic drain + antifreeze |
| 1,500-2,500 sq ft | $200-$350 | Full blow-out |
| 2,500-4,000 sq ft | $300-$500 | Multiple bathrooms, complex systems |
Additional:
Worth it? Professional winterization ($150-$400) is less than thawing frozen pipes ($200-$500) or burst repairs ($2,000-$5,000).
Cost: Usually the same as winterization ($150-$400).
Roof and Gutter Protection
Sump Pump Protection
Water Heater Maintenance
Septic System Care
Central Valley winters are usually mild, but when overnight freezes hit, unprotected pipes fail quickly. Most burst pipes we see each winter are completely preventable with the right steps taken in advance.
Tony’s Plumbing has been protecting Modesto homes since 1994, and we know exactly where and how pipes freeze in this area. If temperatures are forecast to drop below 28°F, it’s time to act.
Contact us for proactive freeze protection, vacant-property winterization, professional pipe insulation, or 24/7 emergency service for frozen and burst pipes.
What does “winterized plumbing” mean?
Full system drain plus antifreeze in all traps for unoccupied homes. Prevents freeze damage when heat is off for extended periods. Includes draining the water heater, blowing out lines with compressed air, and adding RV antifreeze.
How long at 32 degrees before pipes freeze?
6-8 hours at 32°F with wind chill, faster on exposed pipes. Shortens to 4-6 hours at 20°F. Exterior walls and uninsulated lines freeze first. Start prevention at 28°F.
How much does a plumber charge to winterize a house?
$150-$400 for a typical 1,500 sq ft home. Includes draining, blowing out lines, and adding antifreeze. Cheaper than $2,000+ thaw-out and burst repairs. Complex systems: $300-$500.
At what temperature should you let your faucets drip?
Below 28°F, especially overnight. Start with warm-side faucets (reduces hot water line freezes). Focus on exterior wall faucets. Steady drip (pencil-lead thickness) keeps water moving.
Should I drip all faucets or just one?
Drip faucets on exterior walls and unheated areas. In extreme cold (below 20°F), drip multiple faucets. One faucet protects that line only, not the whole house.
Can PEX pipes freeze and burst?
Yes. PEX has more flexibility than copper but still fails under extreme ice pressure. Insulate PEX like any other material. More forgiving but not freeze-proof.
How do you thaw frozen pipes safely?
Turn on the affected faucet. Apply heat with a hair dryer, heat lamp, or warm towels. Work from the faucet toward the frozen area. NEVER use torches, open flames, or high heat. Call a pro if you can’t locate the freeze or the pipe is inside the wall.
Will shutting off water prevent pipes from freezing?
No. Shutting off doesn’t drain pipes; standing water still freezes. Must drain system completely (winterization) or keep heat on with prevention methods (dripping, insulation).
What’s the most common cause of frozen pipes?
Inadequate insulation in unheated spaces (crawlspaces, attics, exterior walls) + temps below 20°F. Pipes on exterior walls without insulation freeze first.
Does insurance cover frozen pipe damage?
Usually yes for sudden bursts, but not if you failed to maintain heat or take reasonable precautions. Vacant home policies require winterization. Check your policy, and document prevention steps.
That bottle of chemical drain cleaner under your sink promises a quick fix. What it often delivers instead is pipe damage, stubborn clogs that don’t fully clear, and $500+ repair bills down the line.
Chemical drain cleaners can generate temperatures approaching 200°F inside your pipes, warping plastic, corroding metal, and weakening joints. They are also poor at effective drain cleaning, failing on the most common causes of clogs like hair, grease, and soap scum. The result is plumbing that looks clear on the surface but is left damaged and one emergency away from failure.
Here’s what really happens when you pour chemical cleaners down your drain and which drain cleaning methods actually work without putting your plumbing at risk.
Lye-based cleaners (Drano) create reactions reaching 200°F inside pipes.
Damage:
Chemical cleaners don’t dissolve common clogs:
They push debris deeper or create recurring partial clogs.
| Cleaner Type | Pipe Damage Risk | Common Failures |
| Lye-based (Drano) | HIGH—melts PVC | Doesn’t dissolve hair |
| Acid-based | MEDIUM – corrodes metal | Toxic fumes |
| Enzyme gels | LOW—but slow | Ineffective on grease |
Plumber Reality: We see chemical cleaner damage constantly warped pipes, corroded joints, and systems that fail unexpectedly. The “quick fix” becomes expensive repairs.
These clear 80% of household clogs without pipe damage.
Why It Works: CO₂ bubbles physically agitate and break down buildup without heat or corrosion.
Best For: Soap scum, light grease, minor hair clogs, preventive maintenance
Best For: Soap scum, light grease, bathroom sinks
Warning: Use hot (not boiling) water on PVC pipes under sinks.
Best For: Kitchen sink grease, garbage disposal maintenance
Best For: Hair clogs, organic buildup, septic-safe maintenance
Best For: Bathroom hair clogs near surface
Impact: Regular maintenance cuts clogs by 50%.
Yes—with limits.
What It Does:
What It Doesn’t Do:
Plumber Truth: Great for maintenance and minor clogs. If it doesn’t clear after 2 tries, you need professional equipment. Don’t keep repeating that’s when you push clogs deeper or damage pipes.
| Mistake | Why It’s Bad | Do This Instead |
| Overusing same method | Wastes time, pushes clogs deeper | Try 2x max, then call pro |
| Mixing cleaners | Toxic fumes, explosive pressure | NEVER mix chemicals |
| Ignoring slow drains | Becomes full blockage | Address immediately |
| Forcing snake tools | Punctures pipes | Stop at resistance |
Kitchen:
Bathroom:
Reality: $5 drain strainers prevent $200 emergency calls.
Hair is the most common bathroom clog and the hardest for chemicals to dissolve.
Keratin protein structure resists most chemical reactions. Standard cleaners can’t break it down; manual extraction beats chemicals every time.
Step-by-Step:
| Tool | Cost | Best For |
| Plastic drain snake | $3-10 | 1-2 feet depth, disposable |
| Wire drain auger | $10-25 | Deeper clogs, reusable |
| Wet/dry vacuum | $50+ | Suction extraction |
| Wire hanger | Free | Near drain opening |
Reality: Hair clogs are 100% preventable with drain covers.
After 30+ years clearing Modesto drains, here’s the truth.
Great for:
Works for 60-70% of minor clogs. Safe, cheap, effective.
Won’t work for:
Mechanical Snaking
Professional augers reach 50-100+ feet, cutting through clogs no chemical can touch.
Hydro Jetting
High-pressure water (3,000-4,000 PSI) scours pipes clean, removing grease, scale, and buildup better than any product.
Camera Inspection
Shows exactly what’s causing the clog and where.
Commercial-Grade Enzymes
Professional strength works better than consumer products.
Baking soda and vinegar are solid for maintenance. Use it monthly. But if you’ve got a real clog that doesn’t clear with 1-2 treatments, call us instead of fighting it.
We’ve seen too many situations where repeated DIY pushes clog deeper or damage pipes. A $150 service call beats a $2,000 pipe replacement.
Chemical Drain Cleaners – Ever
The damage isn’t worth it. We repair more pipes damaged by chemicals than original clogs.
Repeated DIY Attempts
If it didn’t work the first time, it won’t work the third time.
Ignoring Slow Drains
Slow drains become clogged drains. Address early or call us before emergencies.
Chemical cleaners damage pipes and fail on common clogs. Baking soda and vinegar work for maintenance and minor issues. For serious clogs, professional tools clear them without harming plumbing.
We’ve been clearing Modesto drains since 1994. Some DIY methods work great. Some make things worse. The key is knowing when to stop and call in professional equipment.
Contact us at Tony’s Plumbing. No upsells, no scare tactics, just straightforward solutions that work.
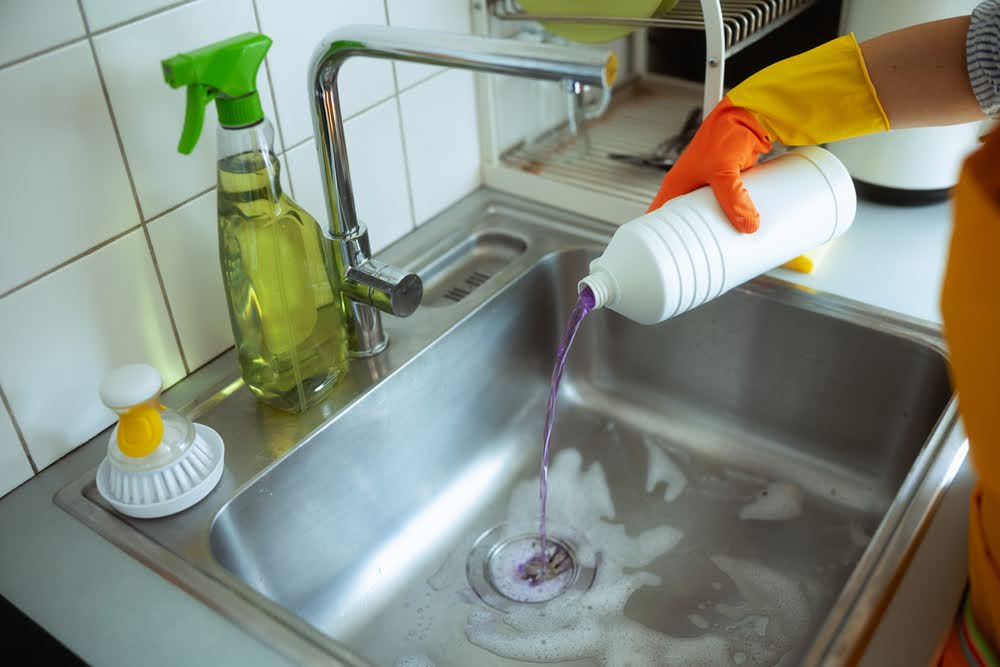
A person in rubber gloves pours purple drain cleaner into a stainless steel sink in a brightly lit kitchen setting, ready to unclog a drain.
What is the most effective DIY drain cleaner?
Baking soda and vinegar for safe buildup removal. For hair: manual removal with drain snake ($3-10) outperforms any liquid cleaner.
Do baking soda and vinegar really clean drains?
Yes, ideal for light buildup and preventive maintenance. Won’t clear complete blockages or tree roots; those need professional equipment.
What will dissolve hair in a clogged drain?
Hair resists chemicals. Enzyme cleaners with proteases work slowly (overnight). Manual extraction with drain snakes is faster and more effective.
What do plumbers say about baking soda and vinegar?
Great for monthly maintenance and minor clogs. Safe for all pipes and septic systems. Won’t handle tree roots, mainline issues, or complete blockages.
How often should I clean drains preventively?
Weekly hot water flushes (2 min). Monthly baking soda and vinegar. Install drain strainers and clean weekly. This cuts clogs by 50%.
Can I use chemical cleaners after trying baking soda and vinegar?
No. Never mix methods, especially chemicals. If natural methods don’t work after 2 attempts, call a professional.
What’s the safest way to clear a completely clogged drain?
Manual removal with a drain snake. For deep clogs or main line issues, professional mechanical snaking or hydro jetting is the only safe option.
Will baking soda and vinegar damage pipes?
No. Safe for PVC, metal, and all pipe types. Mild fizzing without heat or corrosion, unlike chemical cleaners that warp and corrode.
How do I know if my clog needs professional help?
Call if it doesn’t clear after 2 DIY attempts, water backs up into other fixtures, multiple drains clog, there’s a sewage smell, or there’s gurgling from other drains.
What’s the best way to prevent drain clogs?
Drain strainers ($5-15), never pour grease down drains, brush hair before showering, hot water after each use, monthly baking soda/vinegar maintenance.
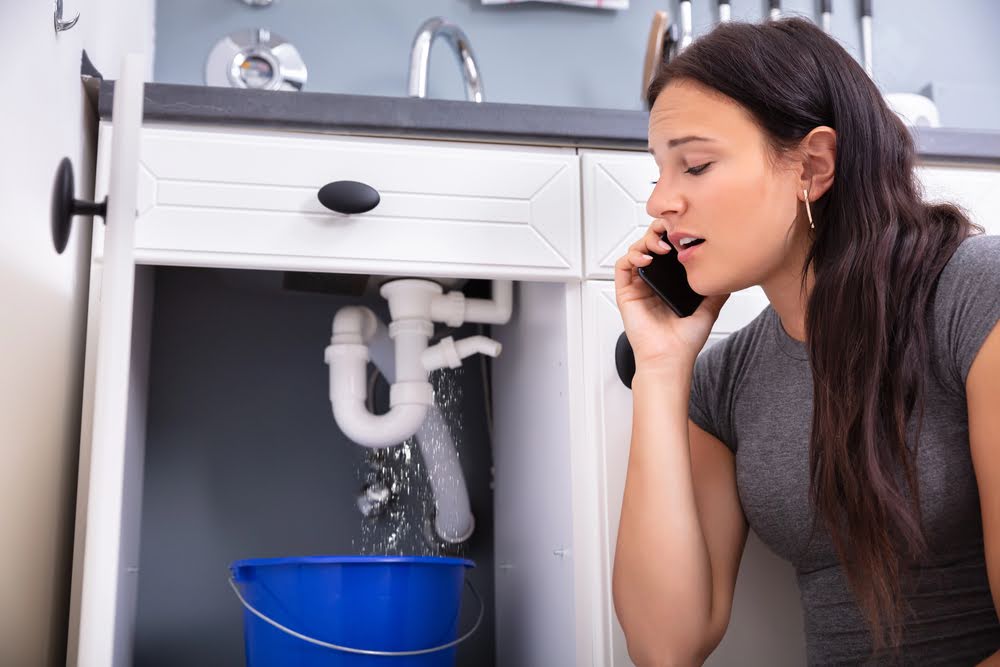
Most homeowners do not realize they have a water leak until damage becomes impossible to ignore. Small leaks hidden behind walls or under floors can quietly weaken structures, damage finishes, and create the perfect conditions for mold. In fact, water damage accounts for around 22.6% of home insurance claims, with the average repair costing close to $15,000.
The good news is that most of this damage is preventable with early detection. This guide teaches you how to spot warning signs, use detection technology effectively, and decide when a leak needs professional attention. With the right knowledge, you can protect your home and avoid devastating repair bills.
Catching leaks early prevents 90% of major water damage. Look for these indicators:
Check Your Water Bill
Listen and Smell
Watch for Visual Changes
Check These First:
What Each Sign Means
| Visible Sign | Likely Cause | Urgency |
| Wet spots on walls/ceilings | Pipe burst or roof leak | HIGH—Call now |
| Mold growth | Slow drip behind drywall | MEDIUM—Inspect and dry |
| High water bill spike | Toilet flapper or underground line | LOW—Often DIY |
Hidden leaks often require a mix of simple tests and targeted inspections to confirm their source.
Turn off all water sources, then check the water meter. If the dial moves or numbers change, a leak is present. Leave the water off for two hours and recheck.
Modern leak detection technology helps catch problems early, often before any visible damage occurs.
Popular brands include YoLink and Govee. These devices:
Brands like Bluebot and DrizzleX offer:
Plumbers use acoustic sensors and infrared cameras for 99% accuracy in pinpointing hidden leaks without invasive methods.
Worth It? Yes. Average water damage claim: $12,000. A $200 monitor pays for itself in one prevented incident. Plus, many insurers offer 5-15% premium discounts for smart detection.
Here are practical steps homeowners can follow to reduce the risk of water leaks by up to 70%.
Inspect under sinks, behind toilets, and around water heaters. Replace worn washers, supply lines, and toilet flappers before failure. Check basements and crawl spaces for dampness or visible moisture.
Insulate pipes in unheated areas such as garages, attics, and crawl spaces. Install drip pans under water heaters and washing machines. Monitor water pressure and install a regulator if it exceeds 80 psi. Use low-flow fixtures to reduce strain on the plumbing system.
Place leak sensors in basements, laundry rooms, and near water heaters. Review water usage for unexplained spikes. Test sensors and replace batteries seasonally to ensure alerts function properly.
Knowing when to tackle a leak yourself and when to call a professional can save time, prevent damage, and reduce repair costs. Here’s what homeowners need to know.
Cost Insight: Professional detection typically costs $300–$600, often saving money by avoiding exploratory wall or floor cuts.
Water leaks and plumbing emergencies can happen at any time, and quick action can save your home from costly damage. With over 30 years of experience serving Modesto homes, Tony’s Plumbing combines advanced leak detection technology with skilled, meticulous workmanship. We locate leaks without unnecessary damage, provide honest pricing upfront, and back every repair with a one-year warranty.
Your home, your family, and your peace of mind are our top priorities. Call Tony’s Plumbing at 209-214-7824 and make your emergency our responsibility.
How do you find a water leak that isn’t visible?
Start with the meter test (turn off all water and watch the meter). If confirmed, use acoustic sensors or thermal imaging. For slab leaks, professional infrared scanning works best.
Does home insurance cover leak detection?
Insurance covers sudden, accidental damage but not gradual neglect. Some policies partially cover professional detection costs. Smart leak detection systems often qualify you for 5-15% premium discounts.
Is water leak detection technology worth the investment?
Yes. The average water damage claim costs $12,000. A $200-500 detection system prevents disasters and pays for itself after one incident. You’ll also receive insurance discounts.
How do plumbers find hidden leaks?
Plumbers use acoustic sensors, infrared cameras, video pipe inspection, tracer gas detection, and pressure testing. These tools find leaks without unnecessary demolition.
What’s the difference between a drip and an emergency?
A slow faucet drip can wait for a scheduled repair. Active spraying, pooling water, spreading damage, or anything involving gas or main lines requires an immediate call.
If you’ve noticed white crusty buildup on your faucets, hard water is likely destroying your plumbing system from the inside out. Here in Modesto and throughout the Central Valley, we’re dealing with some of California’s hardest water, typically 10-15+ grains per gallon.
That mineral-heavy water flowing through your pipes every single day isn’t just leaving spots on your dishes. It’s quietly accumulating inside your plumbing, shortening equipment life, driving up energy bills, and setting you up for expensive failures down the road.
The good news? Once you understand what’s happening and why, you can prevent thousands of dollars in premature replacements and repairs. Let’s break down exactly how hard water damages your plumbing and what you can do about it.
Hard water is water loaded with dissolved minerals (primarily calcium and magnesium).
Water Hardness Classifications:
The Reality: 85% of American homes have hard water. Central Valley groundwater typically measures 10-15+ GPG, with some areas testing even higher.
Hard water damages plumbing gradually, beginning inside your pipes, where mineral buildup quietly alters water flow, heat transfer, and pipe integrity. Over time, calcium and magnesium deposits harden into scale, narrowing pipes and accelerating wear across your entire system.
Each time hard water moves through your plumbing, minerals cling to pipe walls and harden into limescale. Even a thin layer has an outsized impact. Just ⅛ inch of scale can reduce effective pipe diameter by 25–30%, significantly lowering water pressure.
Pipe material affects how quickly damage develops:
Once scale forms, it does not flush out. It continues to grow.
As scale thickens, a standard ¾-inch supply line effectively shrinks to ½ inch or smaller. This restriction shows up as
Clogged showerheads and aerators appear first, but they are symptoms of deeper pipe restriction.
Hard water minerals also speed corrosion. Copper pipes develop pitting and pinhole leaks, while galvanized pipes lose their protective zinc coating and rust rapidly. Warm Central Valley water accelerates these reactions, which is why leaks often appear suddenly after years of unseen damage.
Water heaters suffer the most severe effects. As water heats, minerals fall out of solution and settle as sediment in the tank. This causes:
Tankless systems are also vulnerable. Without treatment, mineral scale coats heat exchangers and often leads to failure within 5–7 years.
If minerals are visible on fixtures, they’re accumulating inside pipes.
Scale buildup increases energy usage significantly.
This signals pipe corrosion has begun.
Quick Test: Inexpensive test strips from hardware stores measure hardness in minutes. Or call us at 209-301-8620 for free water testing.
| Equipment | Normal Life | Hard Water Life | Replacement Cost |
| Water heaters | 12-15 years | 7-10 years | $1,500-$3,500 |
| Dishwashers | 10-12 years | ~7 years | $600-$1,200 |
| Washing machines | 12-15 years | ~8 years | $800-$1,500 |
10-year impact: $2,000-$5,000 in avoidable replacements.
Severe buildup and corrosion require repiping:
The Real Numbers:
A water softener isn’t an expense—it’s protection against thousands in damage.
These reduce symptoms but don’t remove minerals:
These are maintenance tasks, not solutions.
A whole-house water softener is the only effective way to stop hard water damage.
How It Works: Salt-based systems use ion exchange. Calcium and magnesium are captured in a resin bed and replaced with sodium. The system regenerates periodically with salt brine.
Salt-Based vs. Salt-Free:
Only salt-based systems provide full protection.
What’s Involved:
Maintenance:
Based on 30+ years of protecting Modesto homes from hard water:
Prevention (softener) + proper maintenance = decades of trouble-free plumbing.
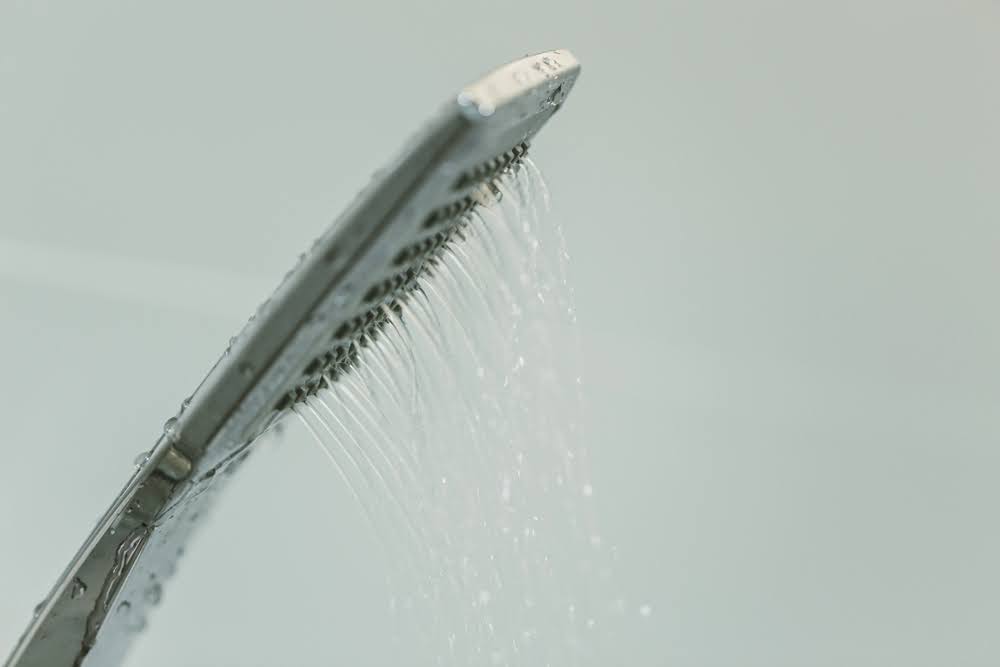
Low water pressure problem closeup at shower head in white bathroom
Hard water damage is one of the most preventable causes of plumbing failure in Central Valley homes. With the right protection in place, you can stop mineral buildup before it shortens equipment life, raises utility bills, or forces emergency repairs.
We’ve been protecting Modesto homes from hard water damage since 1994. Whether you’re already seeing signs of buildup or want to prevent problems before they start, we’ll test your water, evaluate your plumbing honestly, and help you choose solutions that make sense for your home and budget.
Whether you’re seeing signs of hard water damage or want to prevent it before it starts, we’re here to help. Let’s test your water hardness, assess your plumbing system honestly, and discuss solutions that make sense for your home and your budget. Contact us at Tony’s Plumbing for straightforward answers about protecting your plumbing from hard water damage.
Does hard water cause plumbing issues?
Yes. Causes mineral buildup inside pipes, restricts flow, accelerates corrosion, and reduces water heater efficiency by 25-30%, leading to premature failures.
How long do pipes last with hard water?
Copper pipes: 30-40 years instead of 40-50. Galvanized pipes fail even sooner. Damage accelerates as scale narrows pipes and promotes corrosion.
Is soft water better for your plumbing?
Yes. Prevents scale buildup, extends water heater life by 30-50%, maintains full pipe diameter, and significantly reduces repairs.
How do you fix hard water buildup in pipes?
Minor buildup can sometimes be reduced with professional descaling, but severe scale requires pipe replacement. Installing a water softener prevents future buildup but can’t fully reverse advanced damage.
Can you reverse hard water damage to pipes?
Only partially. Mild to moderate scale may be reduced, but corrosion and severe buildup are permanent and require replacement.
What breaks down calcium deposits in pipes?
Vinegar works for fixtures. Plumbers use stronger descaling acids for limited pipe treatment. Removing calcium from entire plumbing systems is impractical—prevention is better.
How long does it take for hard water to damage pipes?
Surface buildup: months. Internal pipe restriction: 5-10 years. Water heater efficiency loss: 2-3 years in hard water areas.
Will a water softener help if I already have hard water damage?
Yes. Immediately stops new mineral buildup and prevents further damage. Existing scale and corrosion remain and may still require repair or replacement.
How much does a water softener cost to install?
$1,500-$3,500 depending on system size and complexity. Most systems pay for themselves within 2-4 years through reduced repairs and energy savings.
Does hard water affect PEX piping?
PEX resists buildup better than metal pipes, but fixtures, valves, appliances, and water heaters are still affected. A water softener protects these vulnerable components.
You expect hot water but get an ice-cold shower. Or your restaurant opens without any for the kitchen. Maybe there’s water pooling around the tank.
So you search for water heater technicians near me and get flooded with options. But not all technicians are equal, and choosing the wrong one can lead to sloppy repairs, unnecessary replacements, or worse.
Here’s exactly how to find a technician you can trust.
Before hiring anyone, ask:
If they dodge these or can’t answer directly, move on.
Licensed water heater repair means the technician has proven knowledge of current codes and safe practices. Insurance protects you from liability if something goes wrong on your property.
If they stall, that’s your red flag.
Not every plumber is a tankless water heater specialist. Some focus on drains, not water heating systems. You want someone who services water heaters regularly and not just occasionally.
A skilled tech won’t push a new unit unless it truly makes sense.
No hot water usually means you need service fast. A solid company will offer 24/7 water heater repair or at least same-day availability.
Honest companies won’t promise a 30-minute arrival during rush hour; they’ll give a timeframe they can actually meet.
A reputable technician should diagnose the problem, explain the fix, and give you a clear quote before starting.
Some charge a small diagnostic fee, especially after hours. That’s normal if disclosed upfront.
Watch out for “We won’t know until we start” tactics.
Low bids usually mean cut corners. A cheap fix that fails next month ends up costing more. A rushed water heater installation near me could shorten your system’s lifespan.
Ask about:
A reliable technician stands behind their work. That’s value, not just price.
Look for:
“This company was great” tells you nothing.
“Sarah showed up on time, diagnosed a failed heating element, explained my options, and got it fixed within two hours” tells you everything.
Technicians with decades of experience will tell you:
A good technician will walk you through the issue in a clear explanation of whether repair or replacement is the best option and give you honest timelines along with straightforward next steps. They will respect your time, your space, and your budget without making you feel rushed or pressured.
You should feel informed and confident asking questions like, “Why did this fail? Is it a common issue? If we repair it, how long will it last? If we replace it, what would you recommend and why?” If the technician gets defensive, vague, or impatient when you ask these questions, that is a red flag.
At Tony’s Plumbing, we’ve helped 209 locals with water heaters for over 30 years. We know how urgent a cold shower or a leaking tank can feel.
Our team specializes in:
We offer same-day service, upfront pricing, and a one-year warranty. No surprises. No games. Just honest, local help, fast.
Call us now to schedule your same-day service and get your hot water running again today.